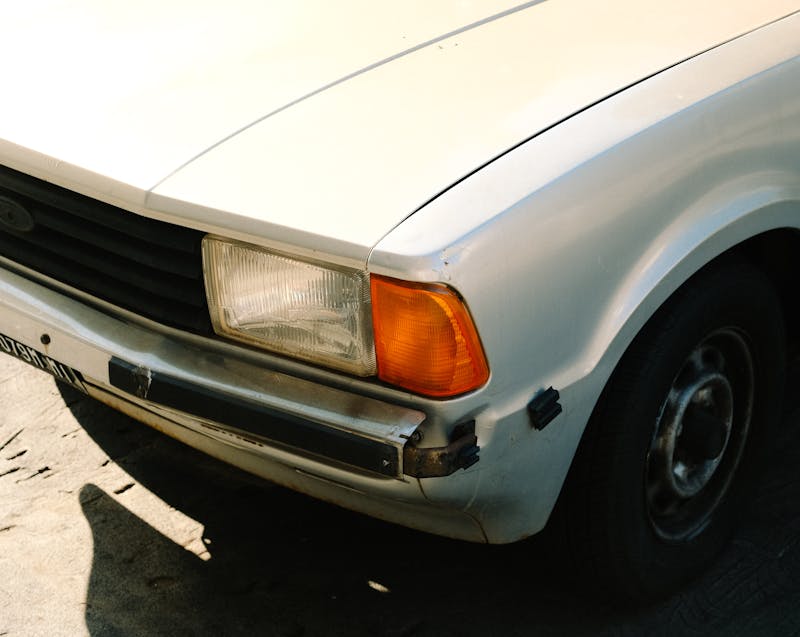
A chipped paint spot on your car might seem like a small issue at first, but it can quickly become a bigger problem if ignored. Even a tiny chip exposes the metal beneath, leaving your vehicle vulnerable to rust and corrosion. While many car owners think that repairing chipped paint requires expensive trips to the body shop, the truth is that you can fix minor paint damage at home with the right tools and a little patience. DIY paint repair methods not only save you money but also help you maintain your vehicle’s appearance and resale value.
In this guide, we’ll walk you through practical, step-by-step methods to repair chipped paint at home. From preparing your car’s surface to applying touch-up paint for a seamless finish, you’ll learn the easiest and most effective ways to restore your car’s look.
Why Does Car Paint Chip in the First Place?
Before learning how to repair chipped paint on your car, it’s important to understand why paint chips occur. Car paint is designed to protect the vehicle from the elements, but it can be damaged by everyday factors.
- Road debris: Gravel, small rocks, and salt kicked up by other vehicles often cause paint chips.
- Weather exposure: Sunlight, rain, snow, and extreme temperatures weaken the paint’s protective layer.
- Improper washing: Using abrasive sponges or brushes can scrape the paint and create chips.
- Door dings and bumps: Parking lot accidents or careless door swings can break paint surfaces.
- Aging paint: Over time, older paint becomes brittle and more prone to chipping.
Knowing the causes helps you not only repair chips but also prevent them in the future. The good news is that most minor chips can be repaired at home without professional help.
What You Need Before Starting: Tools and Materials
To repair chipped paint at home, preparation is key. Having the right tools ensures a smoother repair and a professional-looking finish. Most of these items are affordable and available at auto parts stores or online.
Essential Tools and Materials:
- Automotive touch-up paint (matched to your car’s paint code)
- Clear coat or lacquer
- Fine-grit sandpaper (1500–2500 grit)
- Rubbing alcohol or automotive degreaser
- Small paintbrushes or applicator pens
- Microfiber cloths
- Masking tape and newspaper (for protection)
- Primer (for deep chips that expose bare metal)
- Polishing compound and wax
By preparing these supplies ahead of time, you’ll be ready to repair your car’s paint chips quickly and effectively.
Step 1: Clean and Prepare the Area
Repairing chipped paint starts with a clean surface. Any dirt, wax, or grease can prevent the paint from bonding properly.
- Wash the car: Use car-safe soap to remove dust and debris from the damaged area.
- Degrease: Apply rubbing alcohol or an automotive cleaner to eliminate oil or wax.
- Dry thoroughly: Use a microfiber towel to avoid leaving lint behind.
- Mask the area: Cover surrounding panels and trim with masking tape and newspaper to prevent accidental paint splatter.
Taking time to prepare the surface ensures that the paint adheres properly and the repair lasts longer.
Step 2: Sand the Chip and Remove Loose Paint
If your paint chip has jagged edges or peeling sections, sanding is necessary. This step smooths out the damaged area and ensures the new paint blends well.
- Use fine-grit sandpaper to gently sand the chipped area.
- Focus only on the chip, avoiding surrounding paint.
- Remove any flaking or raised paint around the chip.
- Wipe the area with a microfiber cloth after sanding.
Sanding helps create a smooth foundation so that your touch-up paint looks seamless rather than blotchy.
Step 3: Apply Primer for Deep Chips
If the chip exposes bare metal, applying a primer is crucial. Without it, the metal is at risk of rusting.
- Use a small brush or applicator to dab a thin layer of primer into the chip.
- Allow it to dry completely, usually around 30–60 minutes.
- Do not rush this step, as primer creates the base layer that ensures paint adhesion.
For shallow chips that only affect the top coat, you can skip this step and move directly to applying touch-up paint.
Step 4: Apply Touch-Up Paint
Now comes the most important part: repainting the chipped area. Touch-up paint is available in bottles, pens, or spray cans. Choose the option that best suits your comfort level and the chip’s size.
- Match the paint code: Check the driver-side door jamb or vehicle manual for your car’s paint code. Using the wrong shade will make the repair stand out.
- Shake the paint well: This ensures even pigment distribution.
- Apply thin layers: Dab or brush a small amount of paint into the chip, allowing each layer to dry before adding more.
- Build up gradually: Continue applying layers until the chip is level with the surrounding paint.
Avoid applying too much paint at once, as it can bubble or appear uneven. Patience leads to the best results.
Step 5: Seal with Clear Coat
Once the touch-up paint dries, a clear coat is needed to protect the repair and give it a glossy finish.
- Apply a thin layer of clear coat over the repaired chip.
- Let it dry for at least 24 hours for best results.
- Clear coat acts as a shield, preventing UV rays, dirt, and moisture from damaging the new paint.
This step ensures that your repair looks polished and blends seamlessly with the car’s original paint.
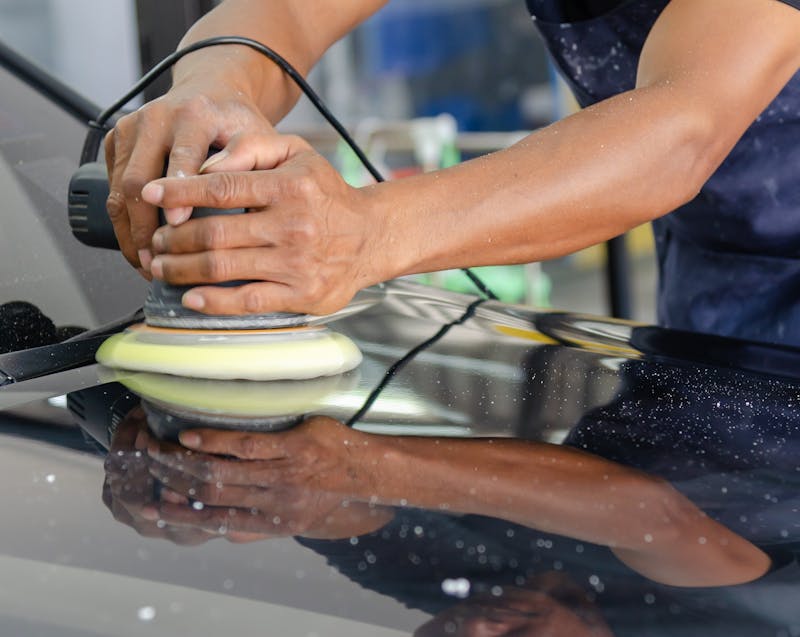
Step 6: Polish and Wax for a Smooth Finish
Even after applying touch-up paint and clear coat, the repaired spot may look slightly raised. Polishing and waxing help smooth out the area and restore shine.
- Polish the surface: Use a polishing compound with a microfiber cloth to blend the edges of the repair.
- Apply wax: Finish with a high-quality car wax to protect the paint and add extra gloss.
- Buff gently: Avoid aggressive rubbing that could damage the new paint.
Polishing and waxing make your DIY repair look nearly professional, leaving the surface smooth and shiny.
How to Repair Chipped Paint on Car Without Repainting the Entire Panels
Many car owners worry that chipped paint requires repainting a whole section of the car, but that’s rarely necessary. By targeting only the damaged area, you can save significant time and money.
- For small chips: Use touch-up pens or small brushes.
- For medium chips: Apply paint in thin coats and sand lightly between layers.
- For multiple chips: Repair each chip individually before sealing with clear coat.
Unless the damage is widespread, full-panel repainting isn’t required. DIY touch-ups are sufficient for most cases and can last for years with proper care.
Common Mistakes to Avoid in DIY Paint Repair
While repairing chipped paint is manageable, mistakes can lead to poor results. Here are the most common pitfalls:
- Skipping cleaning: Dirt and wax prevent paint from bonding.
- Using the wrong paint code: Even small shade differences are noticeable.
- Applying too much paint: Thick layers create bumps and uneven finishes.
- Rushing drying times: Patience is key for durable results.
- Forgetting the clear coat: Without it, repairs may fade or peel quickly.
Avoiding these mistakes ensures that your DIY repair lasts and looks professional.
How to Prevent Paint Chips in the Future
Repairing chips is helpful, but preventing them saves even more time and effort. With a few precautions, you can reduce the chances of new chips forming.
- Apply paint protection film (PPF): Transparent film shields high-impact areas like bumpers and hoods.
- Use ceramic coating: Adds a protective layer against UV rays and debris.
- Drive carefully: Avoid tailgating, as rocks from other cars often cause chips.
- Park strategically: Stay away from crowded areas where door dings are common.
- Wash gently: Use soft microfiber cloths and avoid abrasive sponges.
Preventive measures extend your paint’s lifespan and reduce the frequency of repairs.
When to Seek Professional Help
While DIY methods are effective for minor chips, there are times when professional repair is the smarter choice.
- Extensive damage: Large areas of chipped paint may require respraying.
- Rust formation: If rust has already started, it needs professional treatment.
- Color matching issues: Professionals have advanced tools to blend paint seamlessly.
- High-value vehicles: For luxury or classic cars, professional repairs protect resale value.
If your car’s paint damage is beyond simple DIY fixes, investing in a body shop repair ensures long-lasting quality.
Budget-Friendly Alternatives for Repairing Chipped Paint at Home
Not every car owner wants to buy a full repair kit or invest in professional-grade products. Luckily, there are budget-friendly alternatives you can use to fix minor paint chips without breaking the bank. These methods may not deliver showroom-quality results, but they can significantly improve your car’s appearance and protect it from further damage.
- Nail polish: Clear or color-matched nail polish can serve as a temporary sealant for small chips, preventing rust.
- Household rubbing alcohol: Useful for cleaning the chip if you don’t have automotive degreaser.
- Toothpick application: Instead of buying special applicators, a clean toothpick can help you apply touch-up paint precisely.
- Affordable touch-up pens: Many auto stores sell inexpensive pens that combine primer, paint, and clear coat in one.
These low-cost solutions are perfect for DIYers who want quick fixes while saving money. However, for long-lasting protection, investing in automotive-grade products is still recommended.
Final Thoughts
Chipped paint may be a common problem, but it doesn’t have to compromise your car’s look or value. With a little time, patience, and the right materials, you can repair chipped paint at home and achieve professional-looking results. The process—cleaning, sanding, priming, applying touch-up paint, sealing with clear coat, and finishing with polish—ensures that your repair blends smoothly and protects your car from further damage.
DIY paint repair empowers car owners to take control of minor cosmetic issues without overspending. While professionals may be needed for large or complex repairs, most small chips can be handled in your driveway with excellent results